Introduction
Building your first game
Welcome to Framework! We're excited to have you on board. In this guide, we'll walk you through the process of building your first game using the Framework development platform. By the end of this guide, you'll have a basic understanding of how to create, build, and run a game using our powerful tools and APIs.
Prerequisites
Before we get started, you'll need to make sure you have the following tools installed on your machine:
- Framework Studio - Studio is installed alongside the Framework client.
- Visual C++ Redistributable for Visual Studio 2015-2019 - Required for running the Vortex engine, the underlying engine that powers Framework games.
- CMake - Required for the Studio toolchain to build your game.
Creating a new game
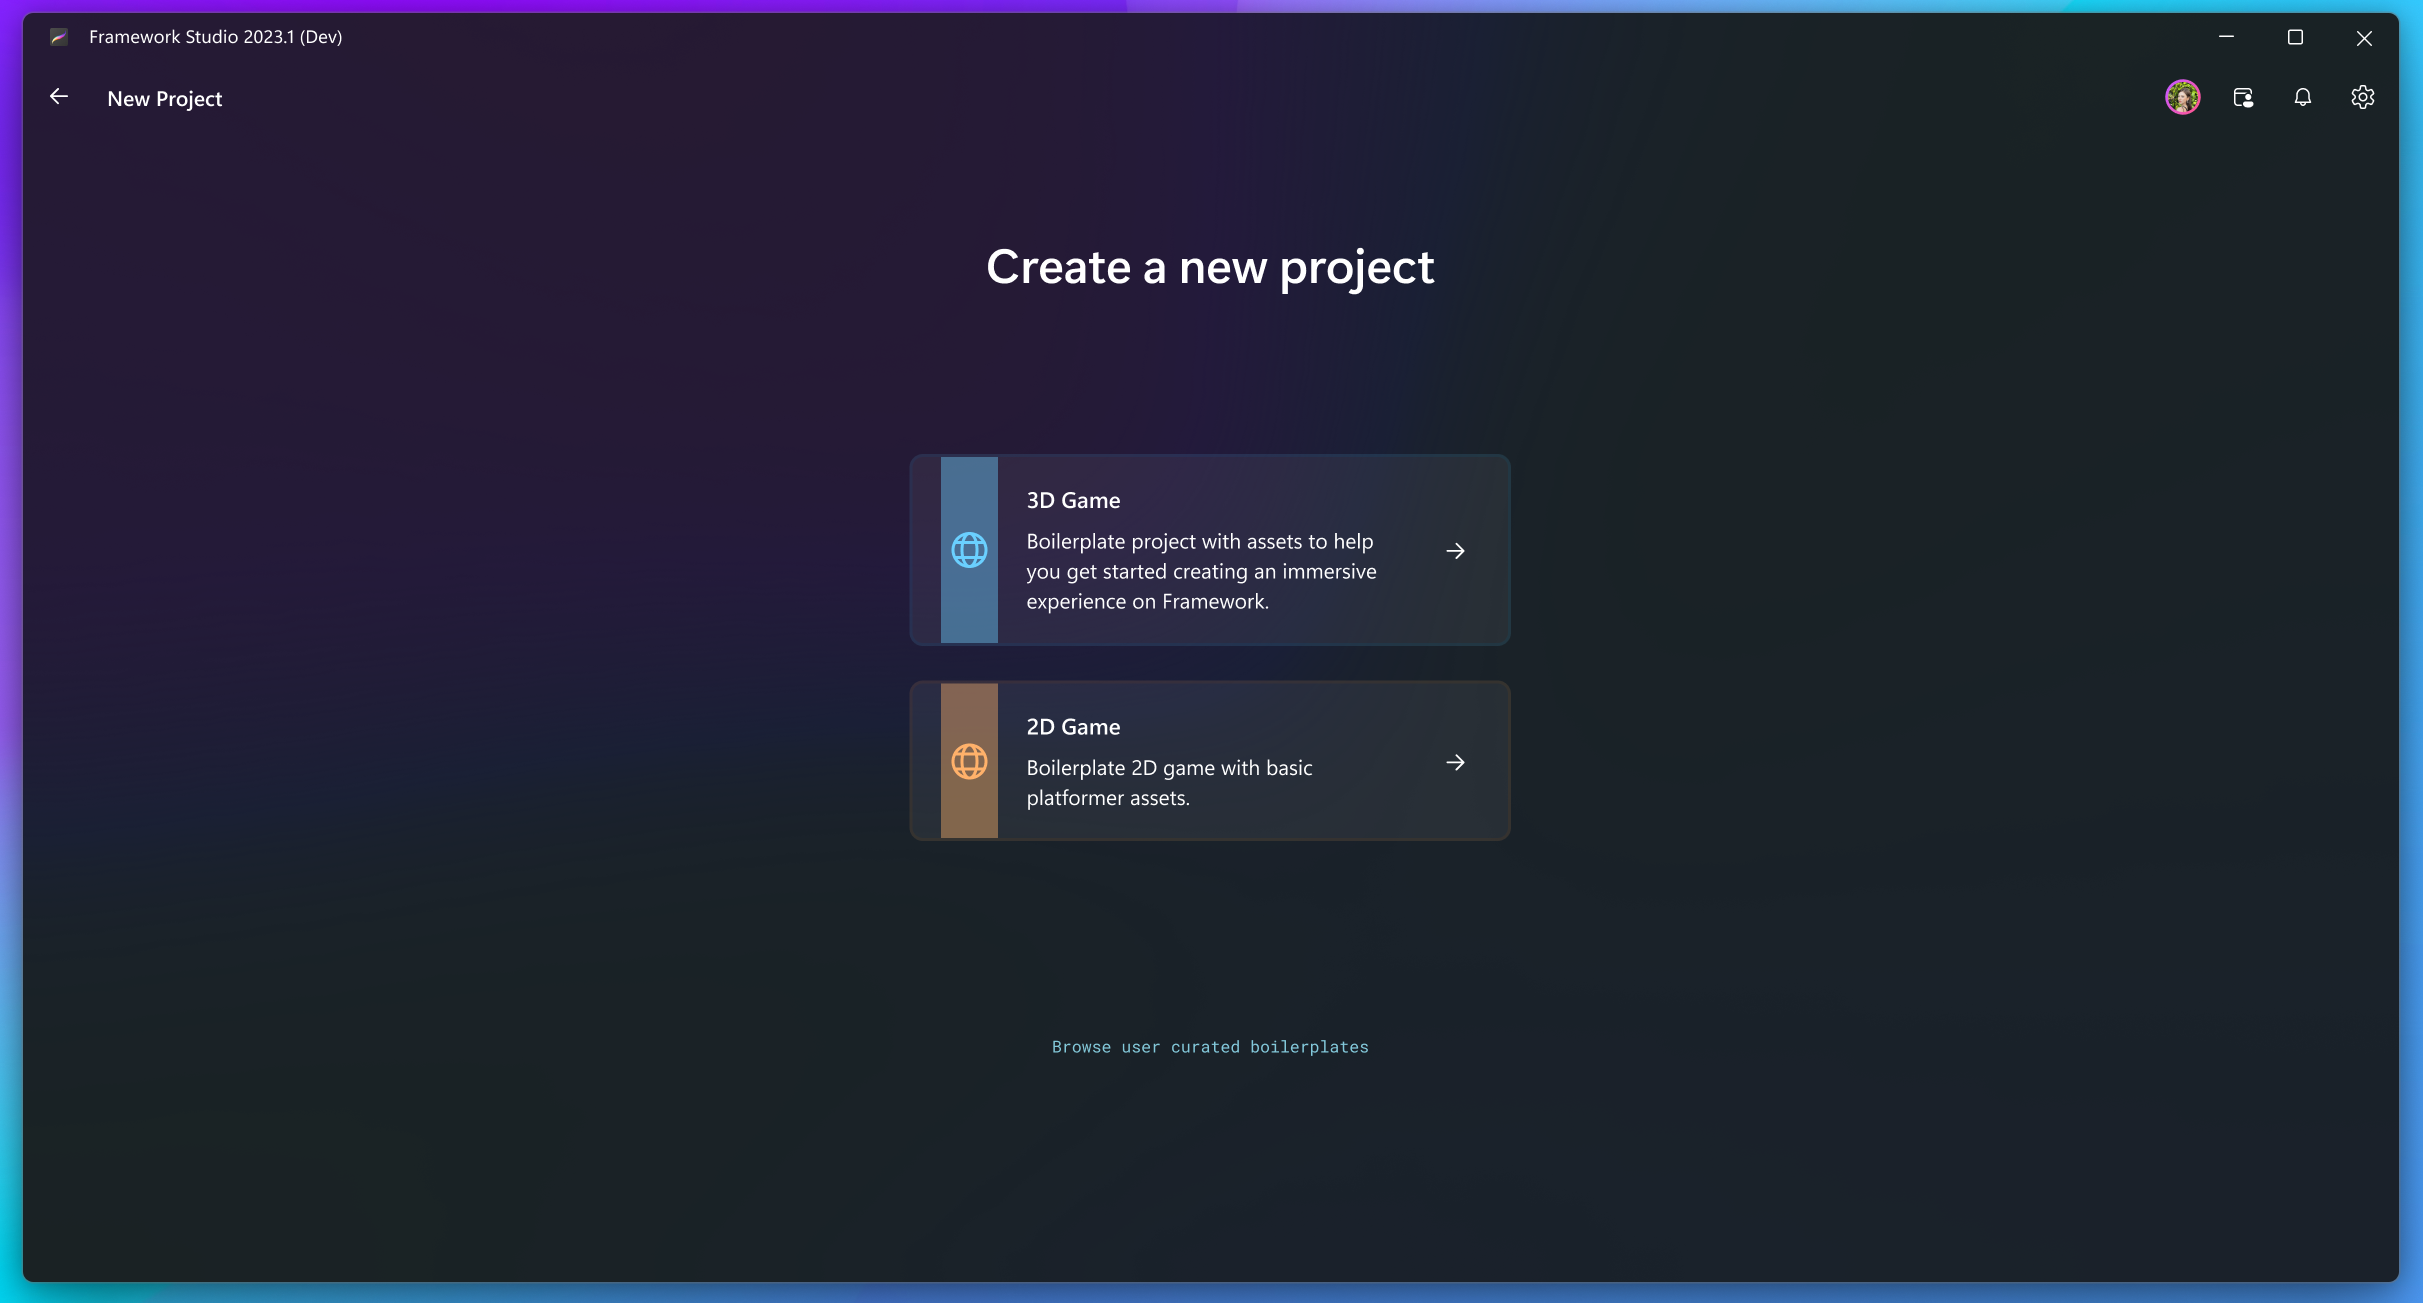
Open Framework Studio and select 3D Game on the home screen after signing in. Enter a name for your game and click the Create game button to create your game.

Where is my game saved?
Your game will be created locally on your machine. To publish your game to Framework, you'll need to "push" your game to the cloud. We'll cover this near the end of this guide.
Understanding the interface
Framework Studio is a complex, feature-rich, and extremely powerful tool. As such, it can be overwhelming for new users. To help you get started, we'll be taking note of the most important parts of the interface.
Toolbox

The toolbox serves as the primary navigation interface for your project, providing a hierarchical list of actors or objects within the active scene. It offers convenient functionality to select actors and highlight them in the viewport which is the main window where you can see your game right in the middle of the window.
The toolbox view can be changed to the Inventory or Assets, which show all the owned assets on your account and the assets within the game, respectively.
Viewport

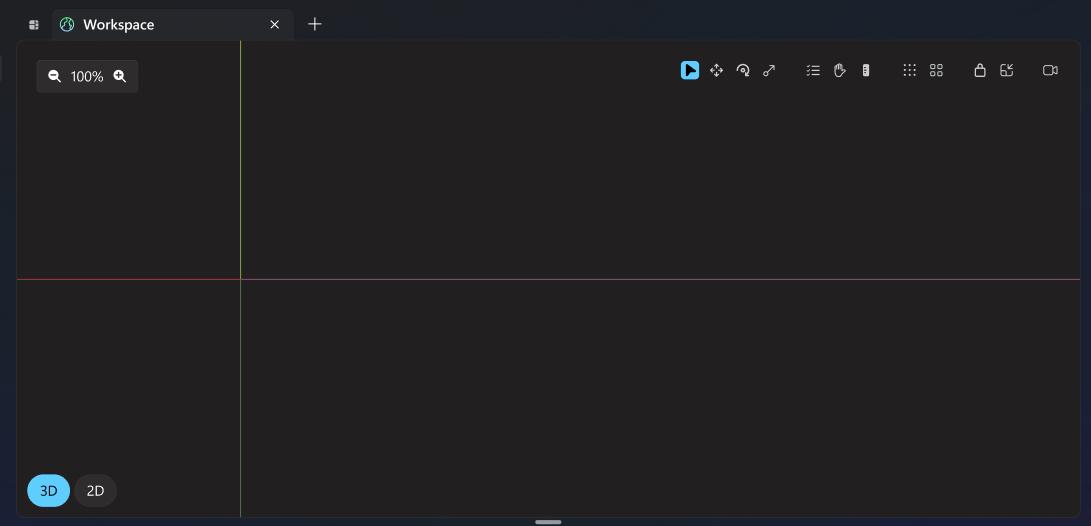
The viewport is the place where you'll be spending most of your time. It's where you can see your game in action and make changes to the scene. You can pan, zoom, and rotate the camera to get a better view of your game, and physically move, rotate, and scale actors in the scene.
In the top left corner of the viewport, you can change the zoom level. The default zoom level is 100%, but you can zoom in and out to get a better view of your game. In the top right, you'll find the viewport tools, where you can change the current tool, such as the selection tool, the move tool, the rotate tool, and the scale tool, lock the camera, and more. Hover over each tool to see its name and description.
Properties

The properties panel is where you can view and edit the properties of the currently selected actor. You can change the actor's name, position, rotation, scale, and more. You can also add components to the actor, edit basic properties of the actor, edit attributes, and assign tags which you can use to programmatically find actors in your game.
Dock

The dock is where you can find a lot of developer tools, such as the output log, problems, terminal, Git tools, and more. These tools are essential for debugging and developing your game.
Top bar

The top bar in Studio is where you'll find all the important tools for game development. It shows errors and warnings, lets you switch between editing modes, and gives quick access to plugins, the Toolkit, and Teams. You can also use the Build & Run button to test your game. And if you need to, you can easily reach your Settings, user account, or search through your project, all from the top bar.
Create a script
Let's create a simple script that runs logic for our game. We'll want a server script for this example. To create a new server-side script, you can:
- Use the Spotlight system to quickly create a new script.
- Press
Alt+Spaceto open the Spotlight search. - Type
nss(short for "new server script") and pressEnter. - Enter a name for your script and press
Enteragain.
- Press
- Right click on
Server Scriptsin the toolbox underCore>Scriptsand selectCreate>Server Script.
Whats the difference between server and client scripts?
Server scripts run on the server, and client scripts run on the client. Server scripts are used for game logic, like controlling the game state, data storage, data validation, and more. Client scripts are used for things like UI, input, and other client-side logic. It's important to understand the difference between the two and when to use them.
Write some code
Now that we have a script, let's write some code. Open the script by double-clicking on it in the toolbox. A new tab will open and the viewport will be replaced with the code editor. You can write your code here.

The boilerplate code simply logs "Hello, world!" to the server's output log when the script is run. Let's change it to something more interesting.
"use server";

import { players } from "@fw/core"; // @fw/* is the same as @vortex/*, simply an alias for the Vortex engine.

players.onPlayerJoined.connect((plr) => {
  plr.sendStyledChatMessage([
    { text: "Welcome to my game! ", color: "yellow" },
    { text: "Enjoy your stay!", color: "green" },
  ]);
});
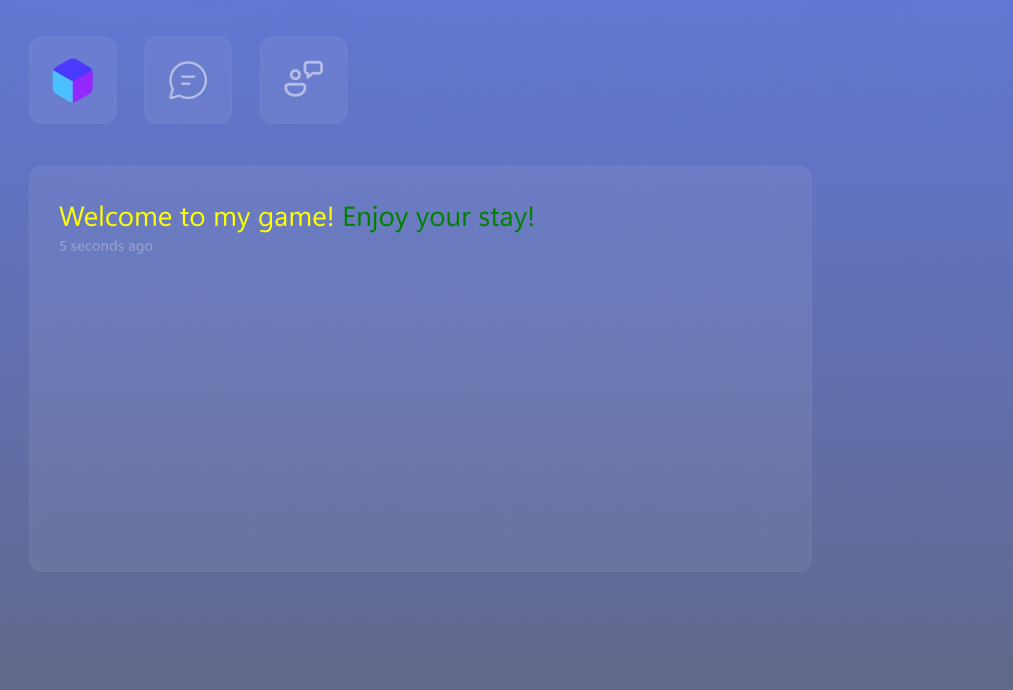
This code listens for the playerJoined event, which is fired when a player joins the game. When the event is fired, the code sends a styled chat message to the player that joined. The message is yellow and says "Welcome to my game! " and green and says "Enjoy your stay!".
Build and run your game
You've written your first script! Now it's time to build and run your game. Click the Build & Run button in the top bar to build and run your game. This will open a new window with your game running in it.

You should see a window with your game running in it. If you see the message "Welcome to my game! Enjoy your stay!" in the chat, then congratulations! You've successfully built and run your first game using Framework.
Push your game to Framework
Want to share your game with the world? You can push your game to Framework to make it available to everyone. To do this, click File > Publish to Framework. This will open a new window where you can enter a name and description for your game, choose a genre, and more. Once you're done, click Publish to publish your game to Framework.
Conclusion
In this guide, you learned how to create, build, and run your first game using Framework. You also learned how to write a simple script and push your game to Framework. We hope you found this guide helpful and that you're excited to continue building your game. If you have any questions or need help, don't hesitate to reach out to us. We're here to help you every step of the way. Happy coding!